
This guide is a general list of steps to follow to setup the TSM Desktop Application. If you have difficulties, please feel free to visit us in Discord. This guide assumes you already have an active TSM Account on our website. If not, please create an account now.
Step-by-step guide
-
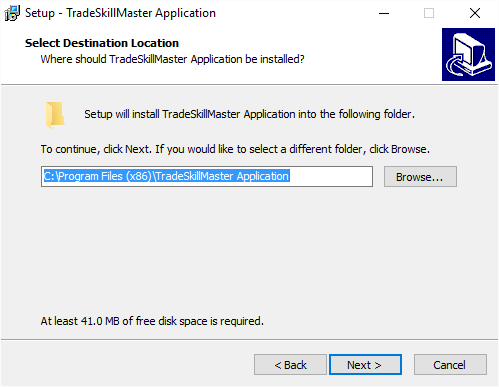
Install TSM Desktop Application
- Download links: Windows | Mac
- While installing the TSM Desktop Application feel free to choose an alternate install location, otherwise just click through the screens as the default location should be fine for most people. Note: The Desktop Application does not need to be installed in your World of Warcraft game directory.
-
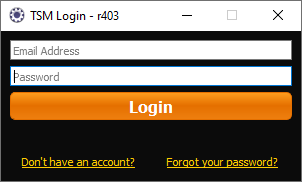
Login to TSM Desktop Application
- Login to the TSM Desktop Application using your TSM account email address and password. Note: You cannot log in to the app with your TSM Username.
- Login to the TSM Desktop Application using your TSM account email address and password. Note: You cannot log in to the app with your TSM Username.
-
Configure WoW Path
- Once logged into the TSM Desktop Application, click the orange "Settings" button in the top right. On the General tab of the Settings window, click the "Browse" button and browse to the top level of your World of Warcraft installation. For the average person this will be C:\Program Files (x86)\World of Warcraft\, in the example screenshot it is D:\Games\Blizzard\World of Warcraft\ - you do not need to select your retail or classic folder specifically. Make sure you have launched WoW at least once before selecting your folder.
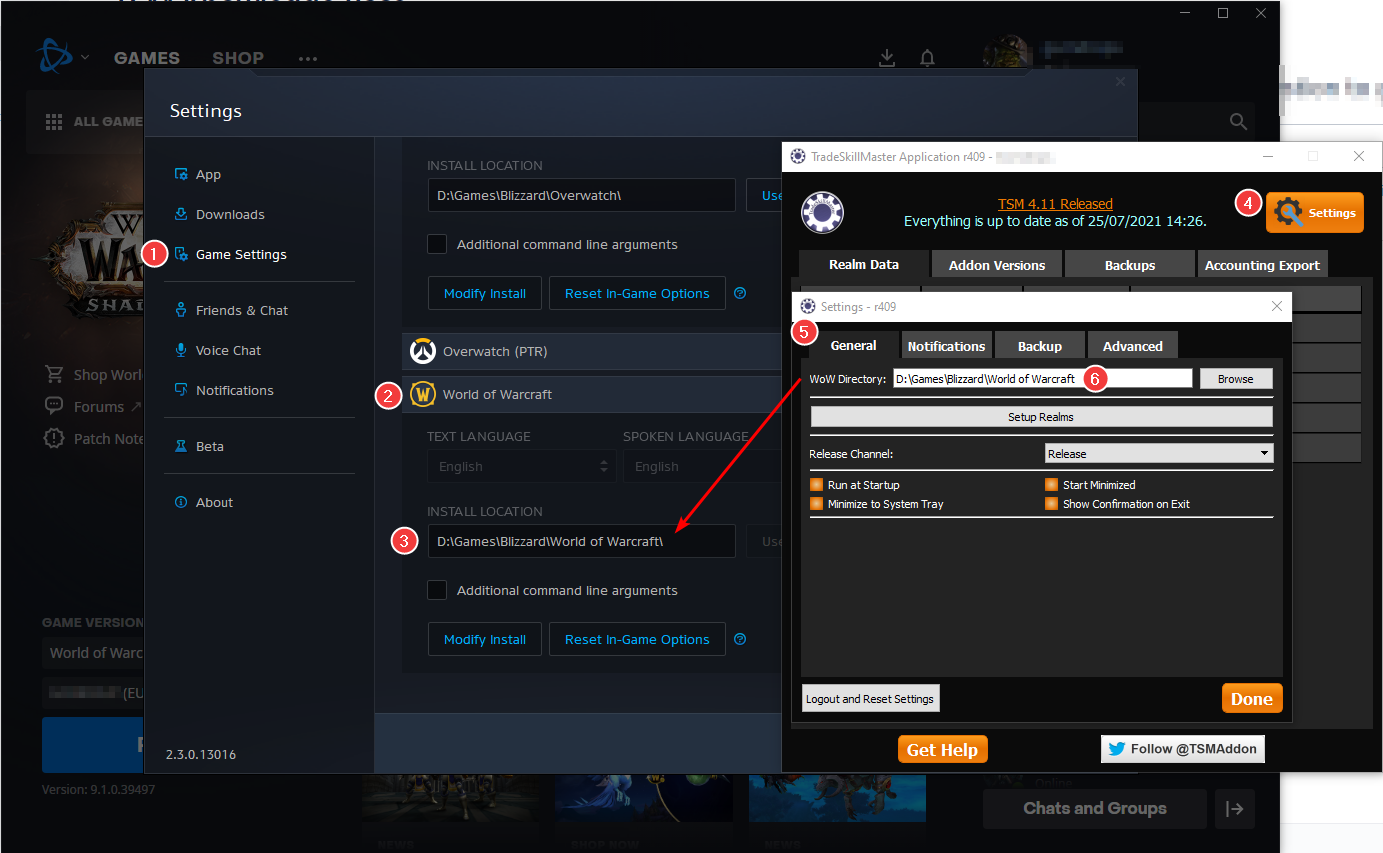
- Once logged into the TSM Desktop Application, click the orange "Settings" button in the top right. On the General tab of the Settings window, click the "Browse" button and browse to the top level of your World of Warcraft installation. For the average person this will be C:\Program Files (x86)\World of Warcraft\, in the example screenshot it is D:\Games\Blizzard\World of Warcraft\ - you do not need to select your retail or classic folder specifically. Make sure you have launched WoW at least once before selecting your folder.
-
Install the TradeSkillMaster Addons
- In the Addon Version tab of the Application, double-click the rows for both TradeSkillMaster AND TSM_AppHelper for the version(s) of the game you play. In the following example the addons are installed for both Retail and Burning Crusade Classic. Note: 'BCC' is Burning Crusade, 'Classic' is Vanilla.
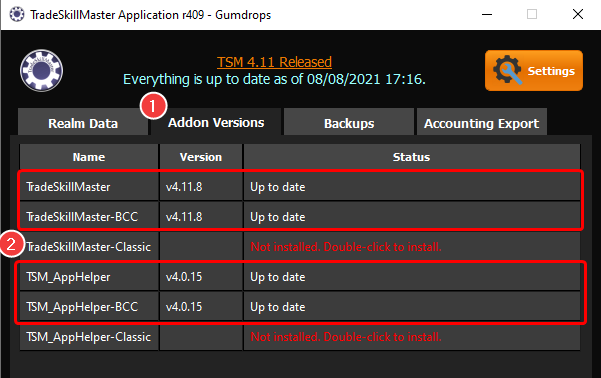
- In the Addon Version tab of the Application, double-click the rows for both TradeSkillMaster AND TSM_AppHelper for the version(s) of the game you play. In the following example the addons are installed for both Retail and Burning Crusade Classic. Note: 'BCC' is Burning Crusade, 'Classic' is Vanilla.
-
Setup Realms
- For Retail and Cataclysm Classic: You can use the dropdown selector in the General tab of the application Settings to pick your realm(s). You can add up to 10 realms with a free TSM account or 25 / unlimited realms with our TradeSkillMaster Gold / Platinum Premium plans respectively.

- For Classic Era / Classic Season of Discovery / Classic Hardcore / Classic Fresh: The desktop app will automatically provide data for any classic realm(s) you play on without any manual configuration. Simply run the desktop app and ensure you have the Classic version of the addon installed.
- For Retail and Cataclysm Classic: You can use the dropdown selector in the General tab of the application Settings to pick your realm(s). You can add up to 10 realms with a free TSM account or 25 / unlimited realms with our TradeSkillMaster Gold / Platinum Premium plans respectively.
-
Restart TSM Desktop Application
- When you have finished configuring your realms, return to the TSM Desktop Application, close it, and restart it. This will force the TSM Desktop Application to pull down the most recent data for your newly configured realms. In addition it will pull down region data for any region that you have added a realm from. If you only have EU realms, you will not receive US data, for example.
- When you have finished configuring your realms, return to the TSM Desktop Application, close it, and restart it. This will force the TSM Desktop Application to pull down the most recent data for your newly configured realms. In addition it will pull down region data for any region that you have added a realm from. If you only have EU realms, you will not receive US data, for example.
-
Login to WoW and Verify
- Finally login to WoW to verify that you have data for your configured realms. If your WoW was already open, please completely close it and restart. The easiest way to verify that you have pricing data is to look at the tooltip of a common item (such as a current expansion tradeskill reagent). Check the time to the right of "TSM AuctionDB" in the tooltip. If it is recent (within the last approx ~1 hour) then you have successfully setup your TSM Desktop Application.
 If you have any issues please feel free to visit us in Discord here.
- Finally login to WoW to verify that you have data for your configured realms. If your WoW was already open, please completely close it and restart. The easiest way to verify that you have pricing data is to look at the tooltip of a common item (such as a current expansion tradeskill reagent). Check the time to the right of "TSM AuctionDB" in the tooltip. If it is recent (within the last approx ~1 hour) then you have successfully setup your TSM Desktop Application.